How to setup and use Proximity Chat in Minecraft
Quick Links
- Installing Proximity Chat (Spigot/Paper)
- Using AleForge’s Blacksmith’s Portal
- Self-Hosting/Other Providers
- Installing Proximity Chat (Forge/Fabric)
- Using AleForge’s Blacksmith’s Portal
- Self-Hosting/Other Providers
[Proximity Chat](https://www.curseforge.com/minecraft/mc-mods/simple-voice- chat) is a Minecraft mod that allows you to have voice chat in Minecraft that is dependent on player position in the world. Keep in mind that in order for players to use Proximity Chat they will need to install the mod locally on their client as well.
Proximity Chat requires an additional port added to your server. [For details, see this guide](https://help.aleforge.net/article/568-how-can-i-get-an- additional-port-for-my-server)
Installing Proximity Chat on your server (Spigot/Paper)
Using Blacksmith’s Portal
- Open the Blacksmith’s Portal
- Stop your server
- Go to
Templates - Select
Simple Voice Chat - Select the Voice Chat Port you’d like to use for Simple Voice Chat and click
Install
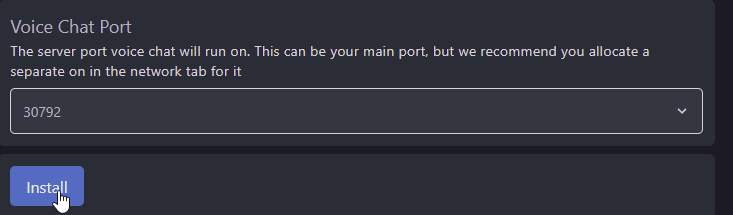
- Start your server and it will be configured
Self-Hosting/Other Providers
- Download the appropriate Proximity Chat version for the mod loader your server is using
- Stop your server
- Open the location of your server’s files
- Drag and drop the uploaded
.jarfile you downloaded to thepluginsfolder of your server - Start your server once to get it to generate the config files for Simple Voice Chat
- Open
plugins/voicechat/voicechat-server.propertiesand changeport=to the additional port you opened for Simple Voice Chat - Restart your server Simple Voice Chat will be installed
Installing Proximity Chat on your server (Forge/Fabric)
Using Blacksmith’s Portal
- Download the appropriate Proximity Chat version for the mod loader your server is using
- Open the Blacksmith’s Portal
- Stop your server
- Go to File Manager and upload Proximity Chat to the
modsfolder for the version of Minecraft you are running - Start your server to generate the configuration file. Once your server has gotten to the
Onlinestate, stop it - Go to
Dashboardand take note of the Server IP. This should be 4 sets of numbers, not a .aleforge.netaddress - Go to
Network

- Take note of the non-Primary port. In the example, it is
25599. If you do not see a non-primary port clickCreate Allocation - Find the configuration file for Simple Voice Chat. On Forge/Fabric servers, it will be in
config/voicechat/voicechat-server.properties - Change the port to your non-Primary port and save the file

- Now, look for
voice_hostand set it tovoice_host=<server_ip>:<port>, e.g.104.194.11.237:25599 - Start your server and connect
Self-Hosting/Other Providers
- Download the appropriate Proximity Chat version for the mod loader your server is using
- Stop your server
- Open the location of your server’s files
- Drag and drop the uploaded
.jarfile you downloaded to themodsfolder of your server - Start your server once to get it to generate the config files for Simple Voice Chat
- Open
config/voicechat/voicechat-server.propertiesand changeport=to the additional port you opened for Simple Voice Chat - Restart your server Simple Voice Chat will be installed