How do I allocate more RAM to Minecraft?
Why do I need to allocate more RAM?
Minecraft Java has an extensive library of mods that you can use to customize Minecraft to play in ways you didn’t think were possible. These mods will increase the RAM needed to run Minecraft, especially when you have many mods installed. Running out of RAM can create lag or other performance issues because your Minecraft Java install has to clear memory and use what little it has allocated.
Whether you are using the vanilla client or a modded client like CurseForge, adding extra memory can help alleviate these issues. At AleForge, we have created this guide to help you learn how to add more RAM to Minecraft on many of the popular launchers used today.
The Importance of RAM
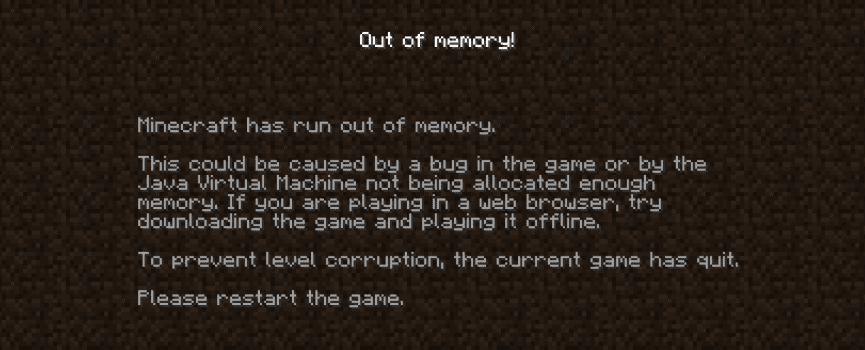
Not having enough memory available to your launcher can cause different performance issues. These problems can range from lower FPS to your game crashing mid-gaming sessions. Preventing as many of these problems in Minecraft as possible is essential to enjoying the game and playing with modpacks. For example, if you have a large modpack installed with low RAM, it will result in a horrible framerate and likely will be unplayable with Minecraft crashes.
Adding More RAM to Minecraft Launchers
Adding more memory to your favorite Minecraft launcher is pretty simple. However, due to there being many different Minecraft launchers, there are differences between them. Whether using the vanilla or a custom launcher, allocating more RAM to Minecraft Java is easy.
- Adding RAM to the Vanilla Launcher
- Adding RAM to CurseForge
- Adding RAM to FTB Launcher
- Adding RAM to Technic Launcher
- Adding RAM to ATLauncher
- Adding RAM to Voidswraith
Default/Vanilla Launcher
- Open the Minecraft Launcher and then open the
Installationspage

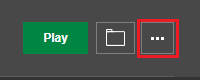
- Locate the profile you are playing with and click the three dots to the right.
- On the options page, click the
More Options, located underResolution
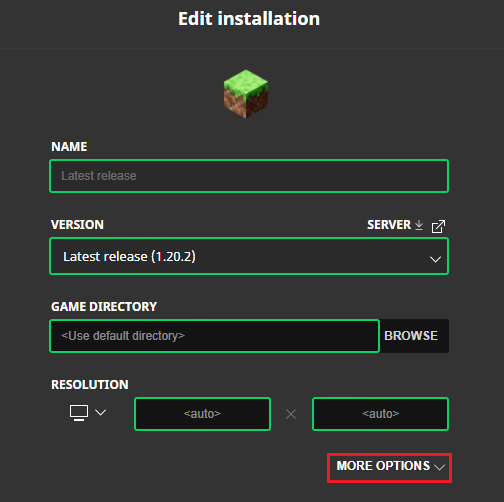
- Scroll down until you see
**JVM Arguments**and find the-Xmx2Gparameter.

- Change
2Gto4Gor another value your computer can support. This value represents the amount of memory allocated to the launcher, which is 2 GB by default. - Press
Saveat the bottom right to apply the change
CurseForge App
- Launch the CurseForge App and click the
Settingsbutton in the bottom left
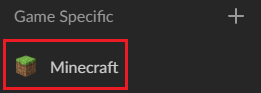
- On the next screen, choose
Minecraftin theGame Specificsection
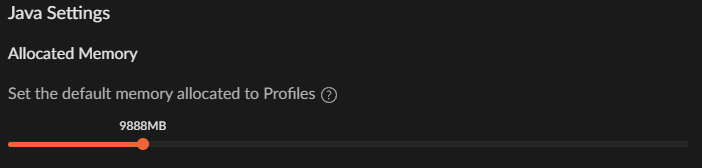
- Now scroll down until you see the
Java Settingscategory - Now adjust the slider in the
Allocated Memoryarea to increase the RAM
- When done, click the X button to save the changes
FTB APP
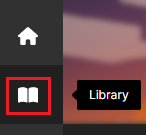
- Open the FTB App and click
Libraryin the top corner.
- Please find the modpack instance you’d like to add more RAM to in the list.
- After you have selected your modpack, click
Settingsto the right of the play button.

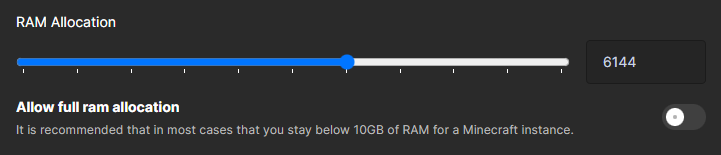
- On this page, adjust the slider for the
Ram Allocationto allocate more RAM to your modpack
- When you are done, click the back arrow to save your changes.
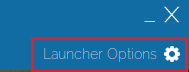
Technic Launcher
- Launch the Technic Launcher.
- Click
Launcher Optionsin the top right.
- Select the
Java Settingstab.

- Choose your allocated RAM from the
Memorydropdown menu.
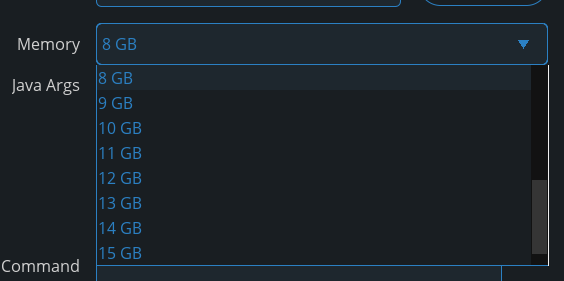
- Click the X to close the menu to save your changes.
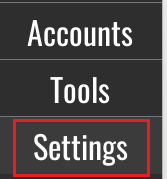
ATLauncher
- Start ATLauncher
- Once it launches, click
Settingsin the bottom right
- Next, select the
Java/Minecrafttab.
![]()
- Change the
Maximum Memory/Ramto your desired amount.
![]()
- Click
Saveat the bottom to apply your change
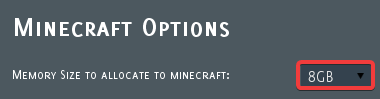
Voidswrath
- Open the Void Launcher
- Click
Optionsin the top right

- Select your desired RAM amount from the
Minecraft Optionsdropdown.
Get Your Own Minecraft Server
AleForge offers some of the best and most high- performing Minecraft server hosting on our high-end hardware, along with all the software optimizations we include:
- Custom Java arguments to tune the server to use less memory and improve performance
- Custom-complied Java release that improves world generation performance by ~20% so you can use less CPU and Memory for your server, resulting in less cost