How do I install mods on my Valheim server?
To join a modded server, all players will need the mods installed on their clients
Installing BepinEx on Your Server
We have simplified the installation process for getting your modding framework for Valheim BepinEx to be as easy as using our Game Swap.
- Stop your Server
- Open Backups and create a backup before installing BepinEx
- Next Open
Settings - In Game Swap choose
Valheim BeipinEx
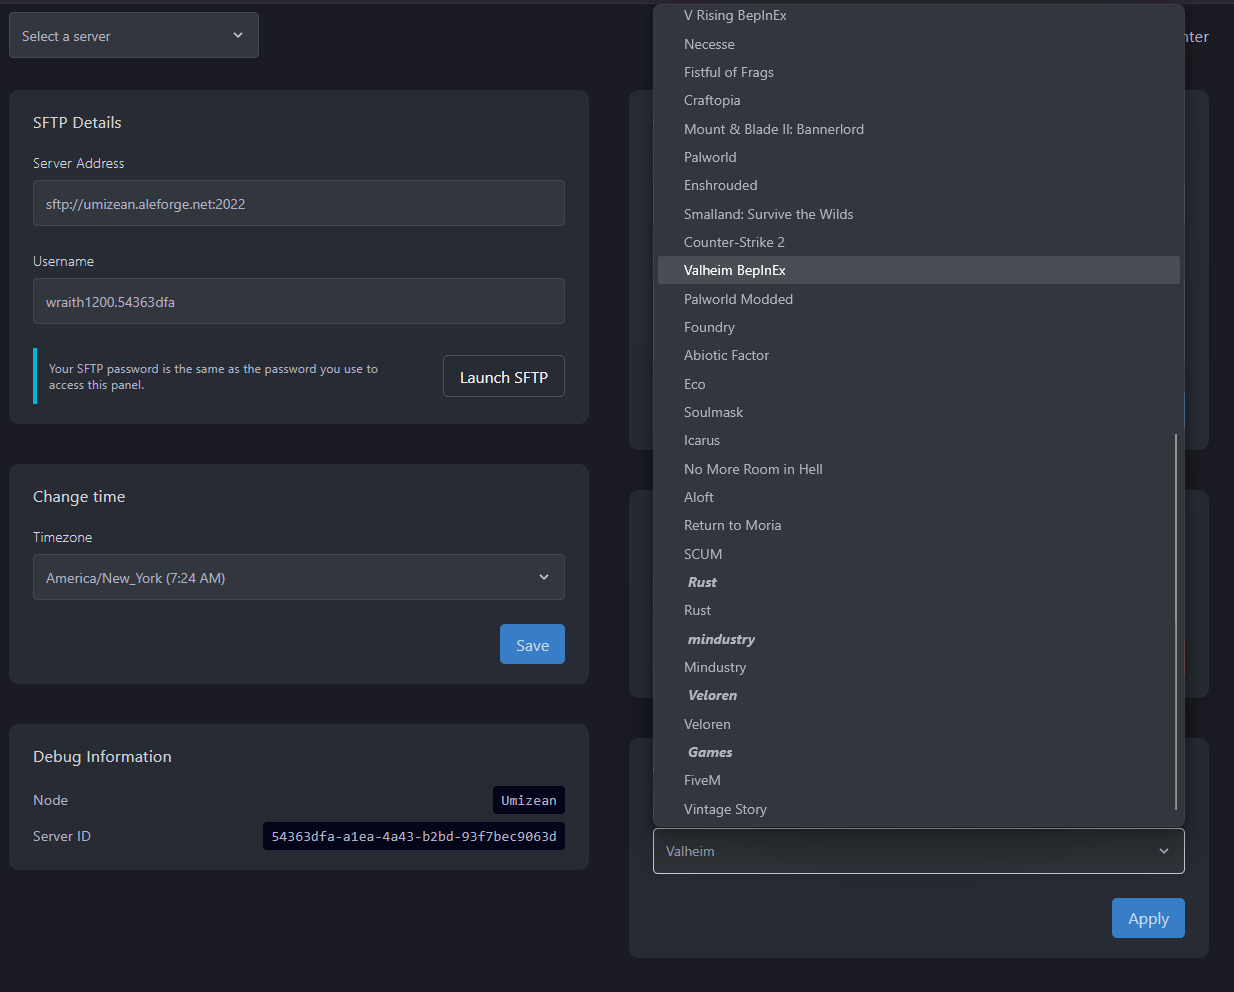
- Do not wipe the data when given the choice
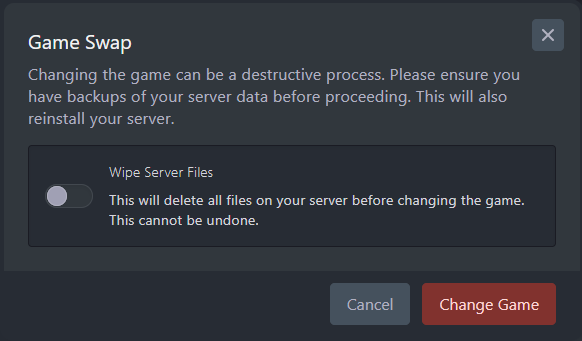
- Click
Change Game - Wait for the install to finish
- Install your mods per the instructions below
Installing Mods Using Thunderstore Mod Manager
Installing mods onto your server is super easy with AleForge and Thunderstore.
Preparing your mods
- Open Thunderstore Mod Manager
- Create a Thunderstore Profile for Valheim
- Enable and install the mods you want to use in this profile
- Once you have downloaded and enabled all the mods you want to use, go to
Settings - Select
Browse Profile Folder

- This will open a folder in your file explorer. Within this folder, navigate to
BepInEx/plugins - Select all the folders in
plugins - Right click on them and select
Compress To ZIP File
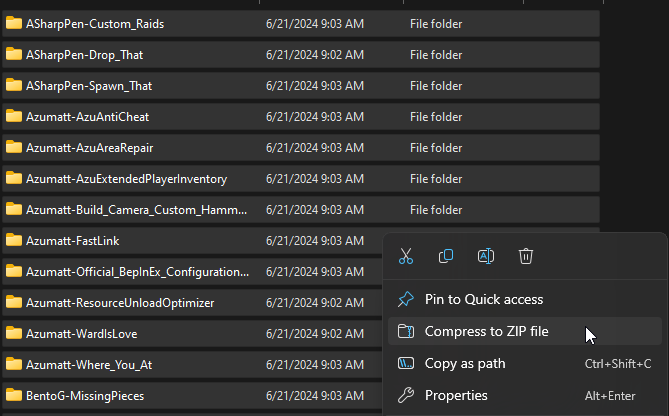
- Name your new
.zipfoldermods. Keep this file handy as you will need it for the next step. Now you are ready to upload your mods!
Uploading your Mods
- Go to the AleForge Panel
- Stop the server
- Open the
File Managertab in the panel - Navigate to
BepInEx/plugins - Upload the
mods.zipfile you created here - Once it is uploaded, right click on it and select
Unarchive - Start your server and enjoy
Installing Mods Clientside
To install mods on your client follow this guide to install BepInEx.
To install Valehim Plus use this guide as it already includes BepInEx.
Other mods you can install can be found here.