How do I create a Custom World on my Return to Moria server?
Quick Links
- Using AleForge’s Blacksmith’s Portal
- Self-Hosting/Other Providers
This guide will show you how to create a Custom World for your Return to Moria server.
Creating a Custom World
Using Blacksmith’s Portal
- Open the Blacksmith’s Portal
- Go to
Startupand changeWorld Difficultytocustom - Change
Server Nameto a new value. - Go to
Filesand openMoriaServerConfig.ini - Under
[World]changeName=to a new value. This will force the server to create a new world in case there is one already generated. If you ever want to change back to your old world, just place the name of the old world here - Under
[World.Create]you can changeType=to make your world a sandbox or a campaign world - Scroll down until you find
Difficulty.Custom - Here you can find all of the settings you can change for your world.
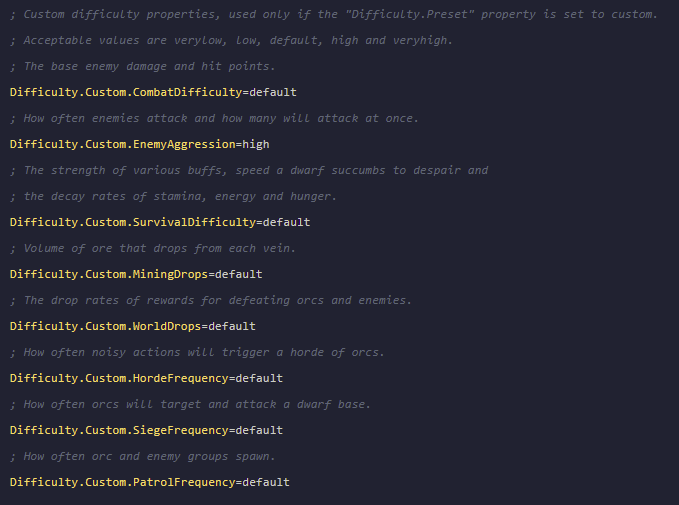
- Acceptable values for these options are
verylow,low,default,high, andvery high
Self-Hosting/Other Providers
- Open the directory where your Moria server is installed
- Open
MoriaServerConfig.ini - Under
[World]changeName=to a new value. This will force the server to create a new world in case there is one already generated. If you ever want to change back to your old world, just place the name of the old world here - Under
[World.Create]you can changeType=to make your world a sandbox or a campaign world - Change
Difficulty.Presettocustom - Scroll down until you find
Difficulty.Custom
- Here you can find all of the settings you can change for your world
- Acceptable values for these options are
verylow,low,default,high, andvery high
Closing
Now you know how to make your own custom world for Return to Moria!
Get your own super powered and affordable Return to Moria server today!