How to install Oxide or Carbon on your Rust Server
Quick Links
Installing Oxide
- Using AleForge’s Blacksmith’s Portal
- Self-Hosting/Other Providers
Installing Carbon
- Using AleForge’s Blacksmith’s Portal
- Self-Hosting/Other Providers
With AleForge, changing the modding framework for Rust is easy! This guide will walk you through the process.
Dive into the world of modding with AleForge’s Rust servers, where Oxide comes pre-installed just for you! Get ready to unleash your creativity and transform your gaming experience immediately!
Installing Oxide
Using Blacksmith’s Portal
Installing through the Plugin Manager
- Open the Blacksmith’s Portal
- Stop your server
- Go to
Rust Plugins - You will automatically receive a pop-up asking you to install Oxide

- Click
Install Oxide - Your server will begin installing Oxide; once your server is running, you can stop it and begin adding plugins
Installing through Startup
- Open the Blacksmith’s Portal
- Open
Startup - Scroll down and find
Modding Framework
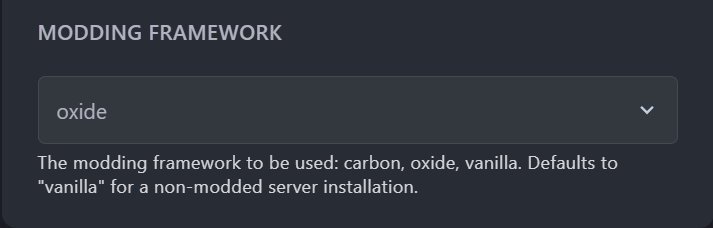
- Change
Modding Frameworktooxide - Go to
SettingsandReinstallyour server - When it is finished reinstalling, start your server
Now your server will start with the correct modding framework.
Self-Hosting/Other Providers
- Download the latest stable release of Oxide from the official GitHub
- If your server is running Linux, download
Oxide.Rust-linux.zip - If your server is running Windows, download
Oxide.Rust.zip - Stop your server
- Navigate to your Rust directory, it should look something like this
rust_server/RustDedicated_data - Move your
.zipfile intoRustDedicated_dataand extract the files. If you are prompted to overwrite any files, say yes. - Start your server. Oxide will now be installed
Installing Carbon
Using Blacksmith’s Portal
- Go to the AleForge Panel
- Open
Startup - Scroll down and find
Modding Framework
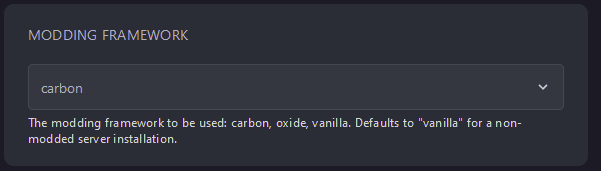
- Change
Modding Frameworktocarbon - Go to
SettingsandReinstallyour server - When it is finished reinstalling, start your server
Now, your server will start with the correct modding framework.
Self-Hosting/Other Providers
- Download the latest stable version of Carbon from the official GitHub
- If you’re running a Linux server, download
Carbon.Linux.Release.tar.gz - If you’re running a Windows server, download
Carbon.Windows.Release.zip - Stop your server
- Navigate to your Rust directory, it should look something like this
rust_server/RustDedicated_data - Move your
.zipfile intoRustDedicated_dataand extract the files. If you are prompted to overwrite any files, say yes. - Start your server. Carbon will now be installed
Closing
Now you can get started modding Rust with all your favorite plugins!
Get your own super-powered and affordable Rust server today!