How do I setup the OpenStack CLI?
To set up the OpenStack CLI, you must have a machine running Linux. This can be your own hardware or a Qube. If you have a Windows machine, you can install the OpenStack CLI using WSL. You can find more information on how to install WSL here. We will be running CentOS Stream 9 for the purposes of this guide.
Setting up the OpenRC file.
First we’ll need to create an API user and get an OpenRC file. Go to Cloud -> API Users. Click the blue plus icon.
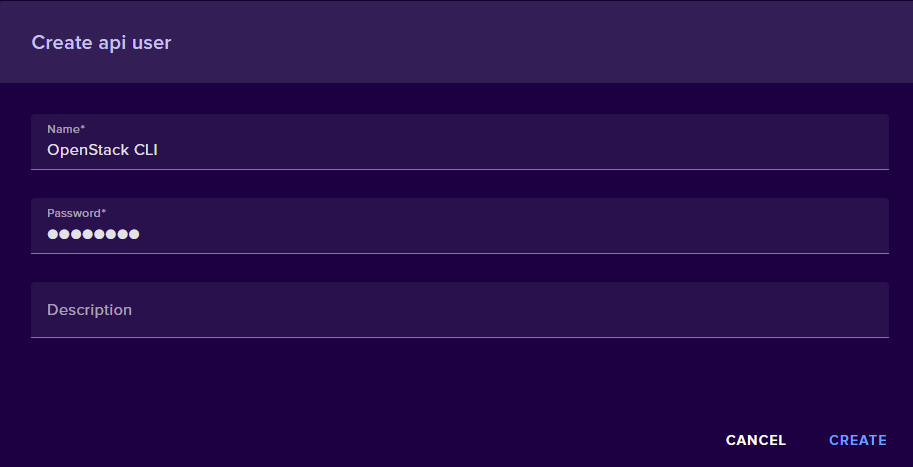
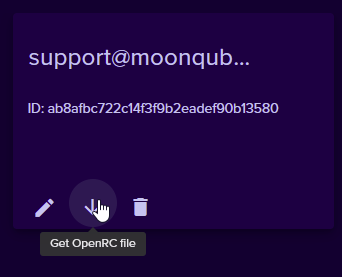
Give your API user a name, a password, and optionally a description. Now click Create. Once your API user has been created. click the download arrow to download the OpenRC file.
Now, login or SSH into your Linux instance. Create a file on your Linux machine and copy the contents of your OpenRC file to it.
Creating and Activating a Python Virtual Environment
In a default CentOS 9 Stream installation, the system’s Python executable is
/usr/libexec/platform-python and is what will be used to create the virtual
environment.
Use /usr/libexec/platform-python -m venv ~/venv to create a virtual
environment in path ~/venv
Next, we’ll use source ~/venv/bin/activate to activate the virtual
environment.
Installing OpenStackClient
Before installing OpenStackClient we should upgrade pipto ensure the
installation goes smoothly. You can upgrade pip by using pip install -—upgrade pip
Now that we have prepared everything, we can install the OpenSttackClient.
There exist two OpenStackClient packages:python-openstackclient and
openstackclient. We recommend using python-openstackclient because it is
maintained much more frequently than the prior package.
Install OpenStackClient using pip install python-openstackclient
Activate User Authentication
The previously created OpenRC file is now used to set environment variables related to authentication.
For example, source ~/openrc.sh Enter the password you set for the API
user.
With all of that done, you can use openstack server list to ensure you’ve
installed the OpenStackClient correctly.